Pieces of the Past
Download lesson plan and included materials
Subject: Social Studies, Mathematics, (optional Art extension)
Grade: 4th
Author: Kris Sloan, revised by Jason Terry and Mary Rodriguez (2023)
Time Duration: Two 45-minute class periods
Overview: Many cultures have utilized clay containers for cooking and storage for thousands of years. Often different cultures have distinctive ceramic styles. Archeologists use pottery as an important clue to the past. Archeologists can often learn information about ancient trade routes, cultural sophistication, religious concepts, and even diet and food, based on pottery found at archeological sites. Not all Native American cultures in Texas developed pottery, so if pottery is found, it can be an important piece of evidence about the people who lived there in the past. If a pot is broken, archeologists reconstruct it by carefully piecing together the sherds. In this lesson students will simulate work in the ceramics lab by classifying pottery sherds and then trying to put history back together.
Objective: Students will:
- Analyze information by categorizing, comparing, and contrasting.
- Compare ways of life of Native American groups in Texas and elsewhere.
- Describe how technological innovations, such as the creation of ceramic pots, benefited people and society in ancient Texas.
- Explain economic patterns of Native American groups.
- Measure accurately in centimeters.
- Record information visually and verbally.
TEKS: Social Studies, Grade 4
- (1B), identify and compare the ways of life of American Indian groups in Texas before European exploration such as the Lipan Apache, Karankawa, Caddo, and Jumano
- (1C), describe the cultural regions in which American Indians lived such as Gulf, Plains, Puebloan, and Southeastern
- (19C), organize and interpret information in outlines, reports, databases, and visuals, including graphs, charts, timelines, and maps
- (21A), use social studies terminology correctly
- (21D), create written and visual material such as journal entries, reports, graphic organizers, outlines, and bibliographies
Mathematics, Grade 4
- (1A), apply mathematics to problems arising in everyday life, society, and the workplace
- (1B), use a problem-solving model that incorporates analyzing given information, formulating a plan or strategy, determining a solution, justifying the solution, and evaluating the problem-solving process and the reasonableness of the solution
Art, Grade 4
- (2C), produce drawings; paintings; prints; sculpture, including modeled forms; and other art forms such as ceramics, fiber art, constructions, mixed media, installation art, digital art and media, and photographic imagery using a variety of art media and materials.
- (3A), compare content in artworks for various purposes such as the role art plays in reflecting life, expressing emotions, telling stories, or documenting history and traditions;
- (3D), investigate connections of visual art concepts to other disciplines.
Materials:
- Pot Diameter Chart (included)
- Data Sheet for each group (included)
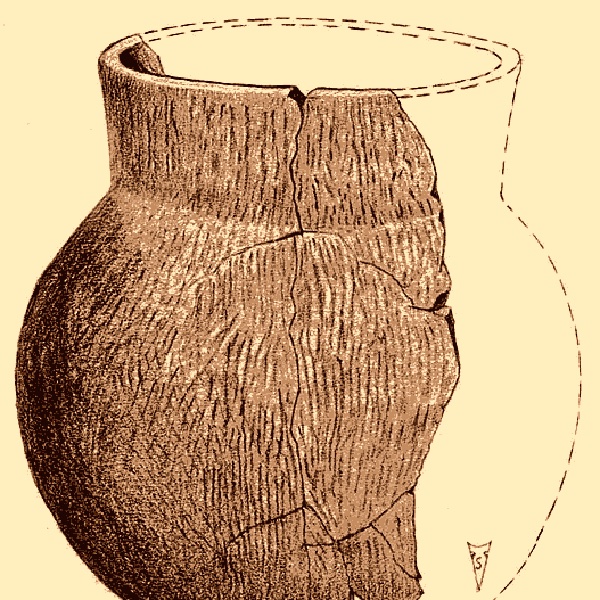
- Unglazed clay flowerpots from a gardening store, or old ceramic plates from a thrift shop (enough to give a bag of sherds to each group of 3-4 students). Alternative: Pottery vessel drawings (included) can be pieced back together with tape. Teacher will need to print and cut vessels into pieces.
- A shoebox filled with sand or fine dirt for each group
- Glue, such as Elmer's
- Small brown paper bag to hold sherds for each group
Activities and Procedures:
Step 1: The teacher needs to break the plates or pots ahead of time into 4-8 smaller pieces. Wrap ceramic pieces with a towel and break over the edge of a table or over an object placed on a tabletop. AVOID using a hammer, as this will cause ceramics to splinter and make gluing difficult. Utilize both glazed and unglazed pots and plates to represent different cultures. Place the sherds from several different ceramic plates together in a small brown paper bag (with site location and number if you’d like). You may want to have one entire plate within one bag along with several "dummy" pieces from other pots in order for the students to classify which sherds belong to which ceramic piece.
Step 2: Introduce the long history of ceramics to students. Have students brainstorm about the uses of ceramics today (e.g., plates used to eat from, cookie jars, flowerpots, etc.). Introduce the idea that many native cultures utilized pottery to cook and store food and seeds. Point out that archeologists can learn much from reconstructing broken pottery. Archeologists can use the style of pottery to determine which cultural group may have occupied the site and with whom they may have traded.
Step 3: Inform the students that an archeologist has uncovered these pottery sherds at a "pretend" archeological dig and that now, as laboratory archeologists, they must help learn about who might have lived at the site in the past.
Step 4: Divide the class into small groups and allow students to sort and classify the sherds of pottery. Students record the total number of sherds on the Pottery Sherd Data Sheet. Students trace the sherds on the data sheet to record size.
Step 5: Students estimate the size, or diameter, of the plate or the diameter of the pot opening by placing a rim sherd (those from the edge of the pot or plate) on the Pot Diameter Chart. Place the sherd on its rim (finished edge) and move until it fits the curve of one of the circles. The number on that circle is the estimated diameter for the complete pot or plate.
Step 6: Students glue the pieces of ceramics back together. Simply stick one sherd into the box of sand with its broken edge exposed and put glue on the exposed edge. Then fit the proper sherd on top and hold until it is firm enough to stand by itself. This way the student need only hold onto the piece for a short period of time, thus making the gluing easier. Sherds may be partly buried to make them stand up for gluing.
Closure: Students display their newly constructed ceramic pieces and make a short written report of the data that was collected during the analysis process. The report should include the number of sherds found and a hypothesis about the culture that made the pots. The report and the data sheet can be posted next to the reconstructed ceramics.
Extension Activities:
Art Extension: Students construct their own pots by utilizing the rolled-clay method, which involves rolling clay into long strips and then stacking the strips to form containers. Allow students to decorate the pots before the teacher breaks them into pieces. Have students write a story about the history of their pot- who made it, why they made it, what it was used for, when it was made, and how it came to be broken, etc.
Allow students to learn more about the Caddo at these Texas Beyond History sites: